Instructions - Three hole Cleats
Step 1. Determine cleat placement.
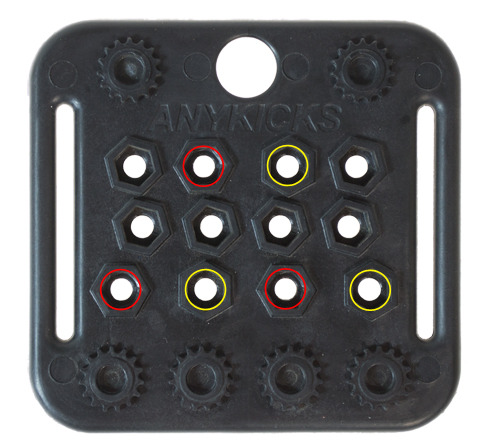
In the drawing below the red circles indicate hex holders that would be suitable for use with the right pedal and the yellow circles indicate hex holders that would be suitable for the left pedal. Exact cleat placement will be determined by how you plan to use Anykicks and what type of pedals you are using them with.
Step 2. Affixing the Cleats**
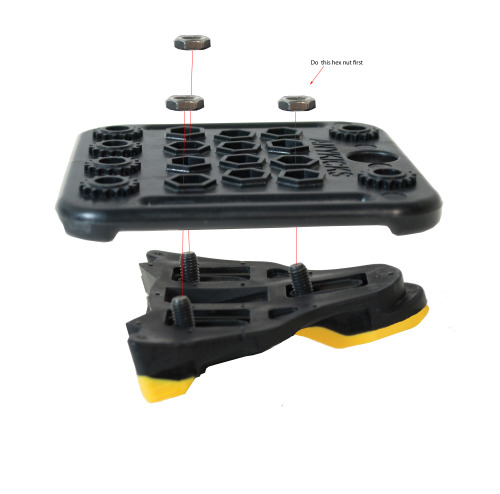
Once you have established the set of holes you will be using, slip a hex nut into the top hex holder. While holding the hex nut in place flip the plate over and align the cleat with the appropriate hole. Insert the bolts provided with your cleats or if need be use the longer bolts supplied with Anykicks. The mounting hole at the front of the cleat will provide the easiest initial mounting. Starting with the bolt closest to the front of the cleat mounting slot will result in the smallest gap and should be enough to thread the bolt into the hex nut. Tightening the initial bolt will reduce the curvature of the cleat and make affixing the remaining bolts possible.
Affix the remaining bolts and and fine tune the cleat alignment. It may be necessary slightly loosen the first bolt in order to make adjustments to cleat placement. If desired you may use one of the provided shims which can be slipped between the cleat and the underside of the plate in order to prevent the bolts from sticking up above the plate surface. Once desired cleat position is obtained tighten the bolts alternating until snug. Torque the bolts to 5-6 N•m.
*Speed play Cleats should be attached using the three hole to four hole adapter. The rectangular shims provided with Anykicks will level out the Speedplay adapter and provide a flat platform to affix the speedplay style cleats
**Some types of SPD-sl cleats may require slightly longer bolts than provided. Please contact us if you are having difficulties attaching your spd-sl style cleats.